Introduction
If you’re managing large sums of crypto, having a single private key floating around isn’t exactly ideal, especially when multiple people in your company need access. That’s where Fireblocks comes in. Think of it as a more advanced, institutional-grade replacement for MetaMask, where instead of a single person holding the keys, access is split across a group. This is what’s known as key management.
Since launching, Fireblocks have packed in a ton of extra features: staking, swaps, minting, fiat on-ramps, automation and more. But for most users, secure key management is the core reason to use it.
This quick Fireblocks 101 will give you a simple breakdown of how their key management works and why it matters.
Key Management
Fireblocks launched its key management service in 2018 to solve a big problem: private keys are a single point of failure. Instead of having full private keys lying around, Fireblocks splits them into fragments (called key shares) so that no one person ever holds the entire key. This well established technique, known as Multi-Party Computation (MPC), has been around since the 1980s and is used in many industries.
When a transaction needs to be signed on-chain, the key shares come together to generate a signature without ever reconstructing the full key. One of the parties in this process is Fireblocks itself, but this remains a non-custodial solution since Fireblocks never has full control over the keys. In practice, users approve transactions from their mobile app with a biometric check.
Wait a minute, you may ask, isn’t this a bit like what Safe Wallet (formerly Gnosis Safe) does? Yes there is some overlap in functionality and more on that later.
Terminology
Fireblocks have some specific terminology they use. We will use it too.
Vault Accounts
A vault account (or sometimes just “account”, depending on what Fireblocks screen you’re looking at) is a collection of blockchain addresses whose private keys are managed by Fireblocks. For example you might have a vault called “Trading” that groups together addresses on Bitcoin, Ethereum, Base and any of 100 other chains that Fireblocks supports.
Unlike MetaMask you don’t get to “show private key”, with one exception discussed below about backups.
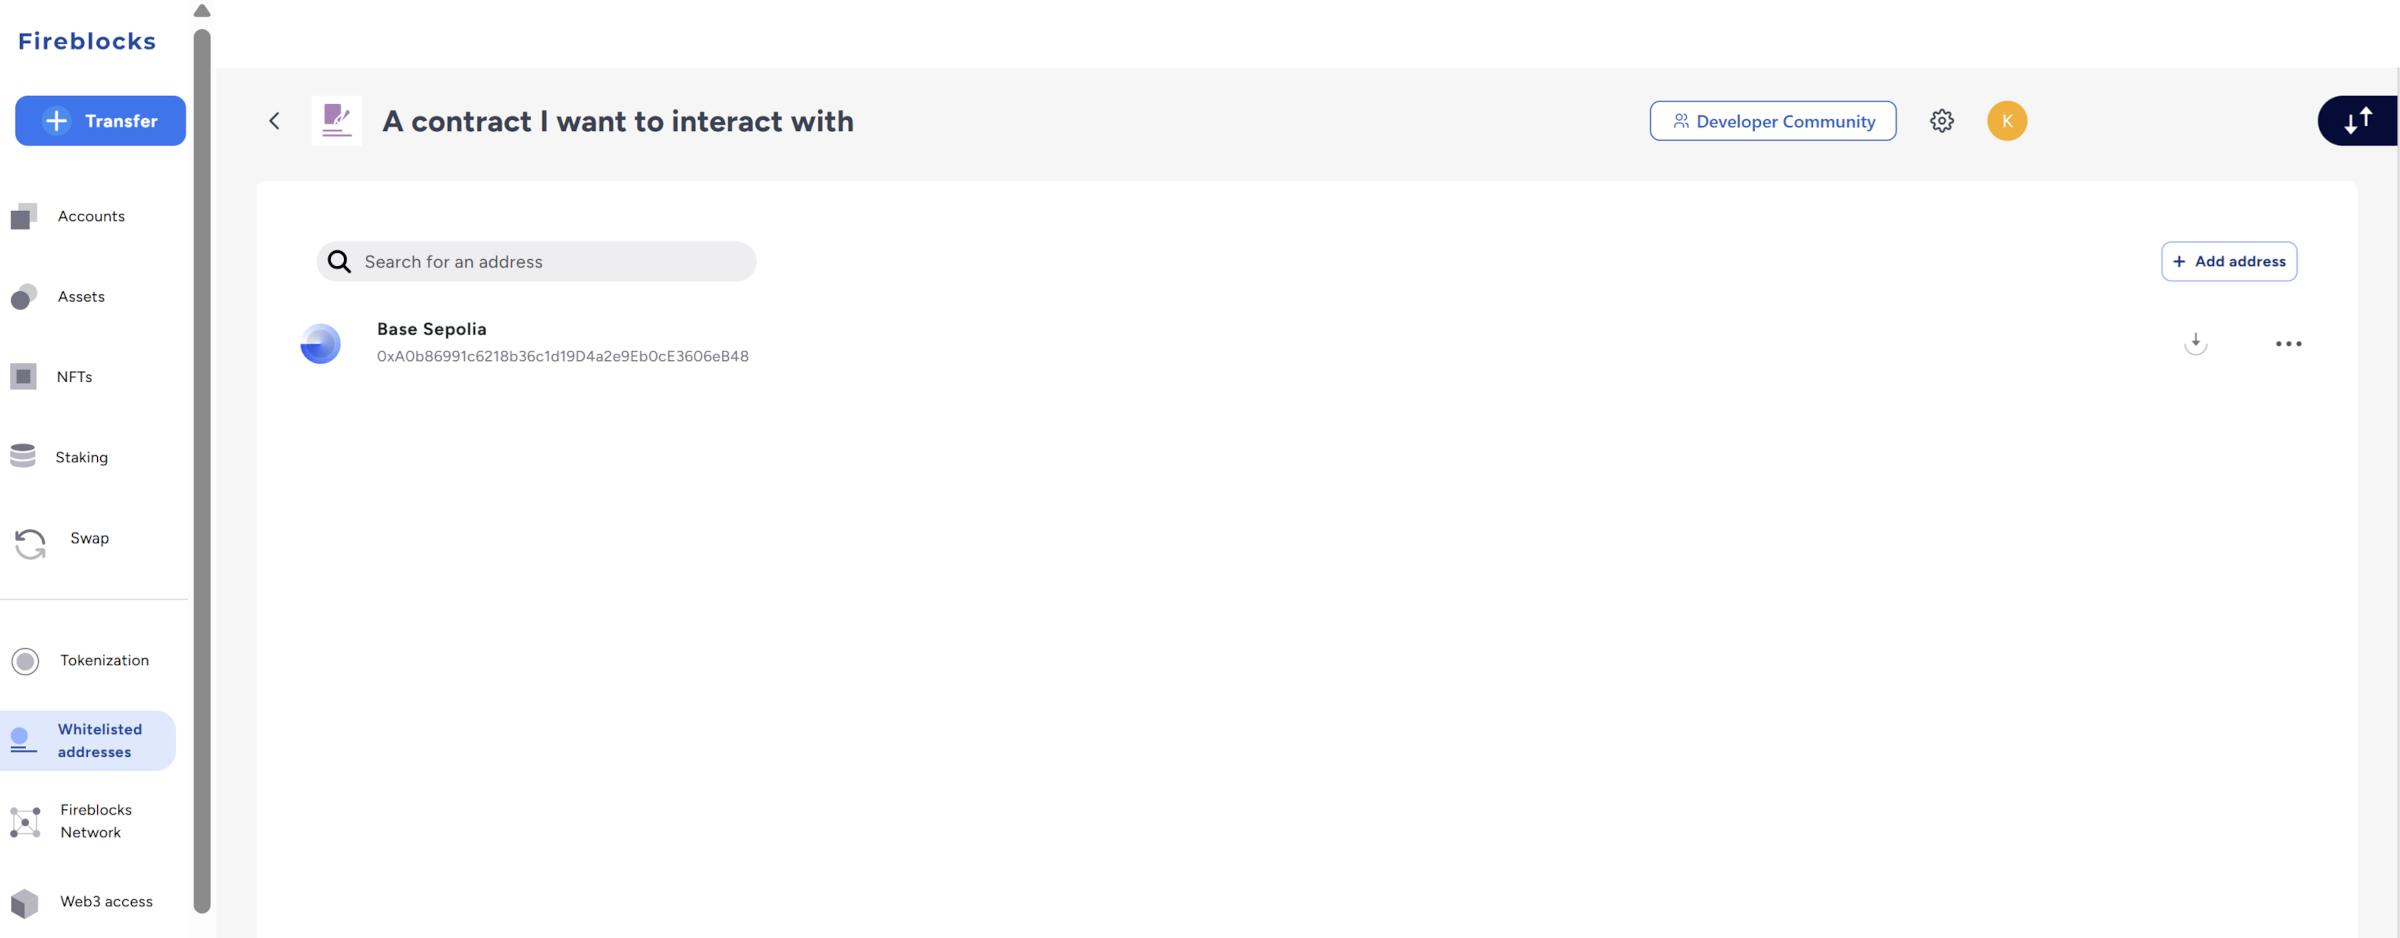
Whitelisted Addresses
Yes, the rest of the world have moved onto “allow lists” or “permit lists”, but here it is still whitelists. The list of whitelisted addresses form the “world” that your vault accounts can interact with. To be more accurate, Fireblocks lets you define a “whitelisted wallet” that is in fact an address + asset pair. For example you might whitelist address 0x123 for USDC, which would mean you could send it USDC, but you could not send it DAI unless you whitelisted the 0x123 and DAI pair also.
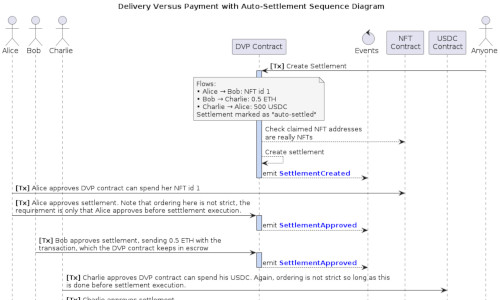
Transaction Authorisation Policy (TAP rules)
Transaction Authorisation Policy (TAP) rules are configuration records you define to control who needs to sign what transaction. A Fireblocks transaction has an initiator, a from and to on-chain address and variously an asset and an amount or a function call, depending on the type of transaction. The initiator is a Fireblocks user, which could be the Fireblocks API. If you’ve maintained firewall records before, the TAP rules work in the same way. Rules are assessed one-by-one and as soon as one matches it is used.
So for example you could configure a TAP rule to say:
if
    the Fireblocks API is initiating a transaction
    and it is sent from any vault account address
    and the destination address is `0x123`
    and the token being sent is `USDC`
then
    we will allow it if it is under $10k
endif
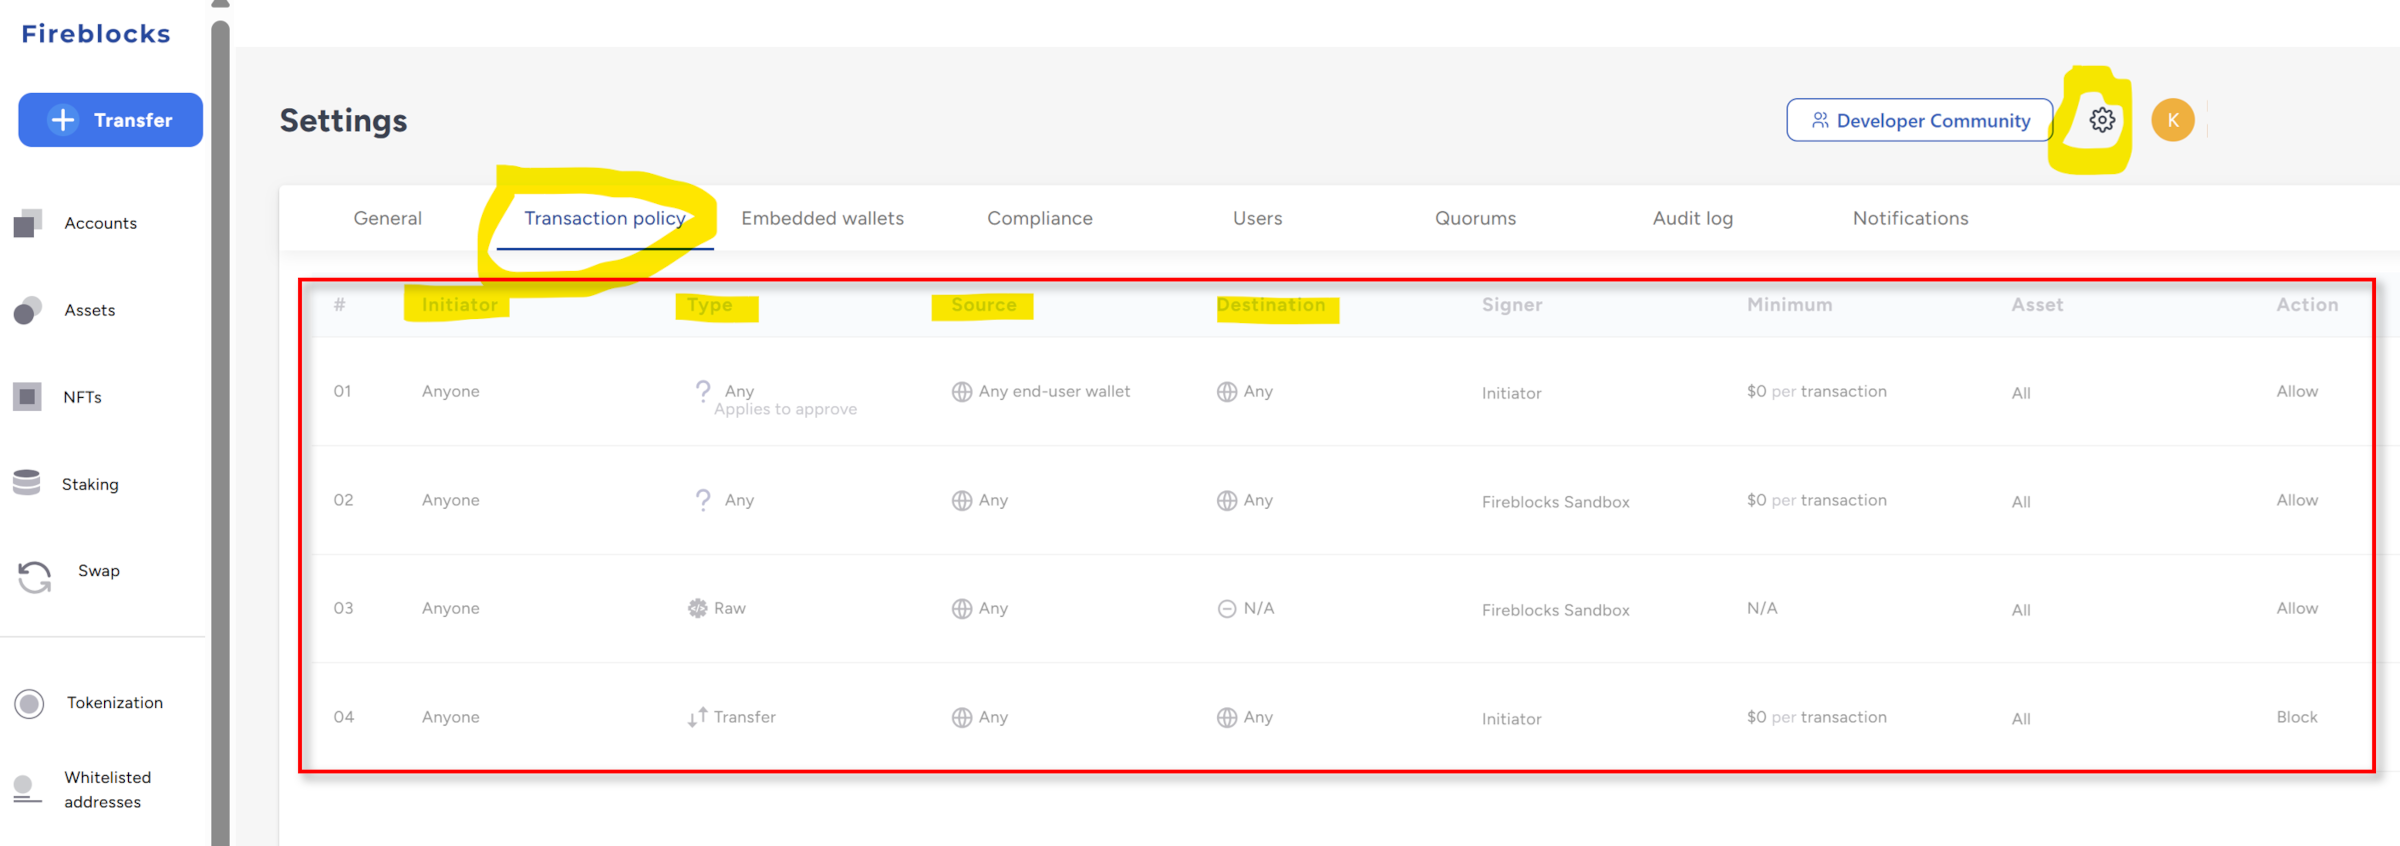
If Fireblocks works through all the TAP rules without a match, then it defaults to blocking the transaction. It then issues a blocked by policy message, that you will become familiar with if you’re configuring TAP rules, see also
this post.
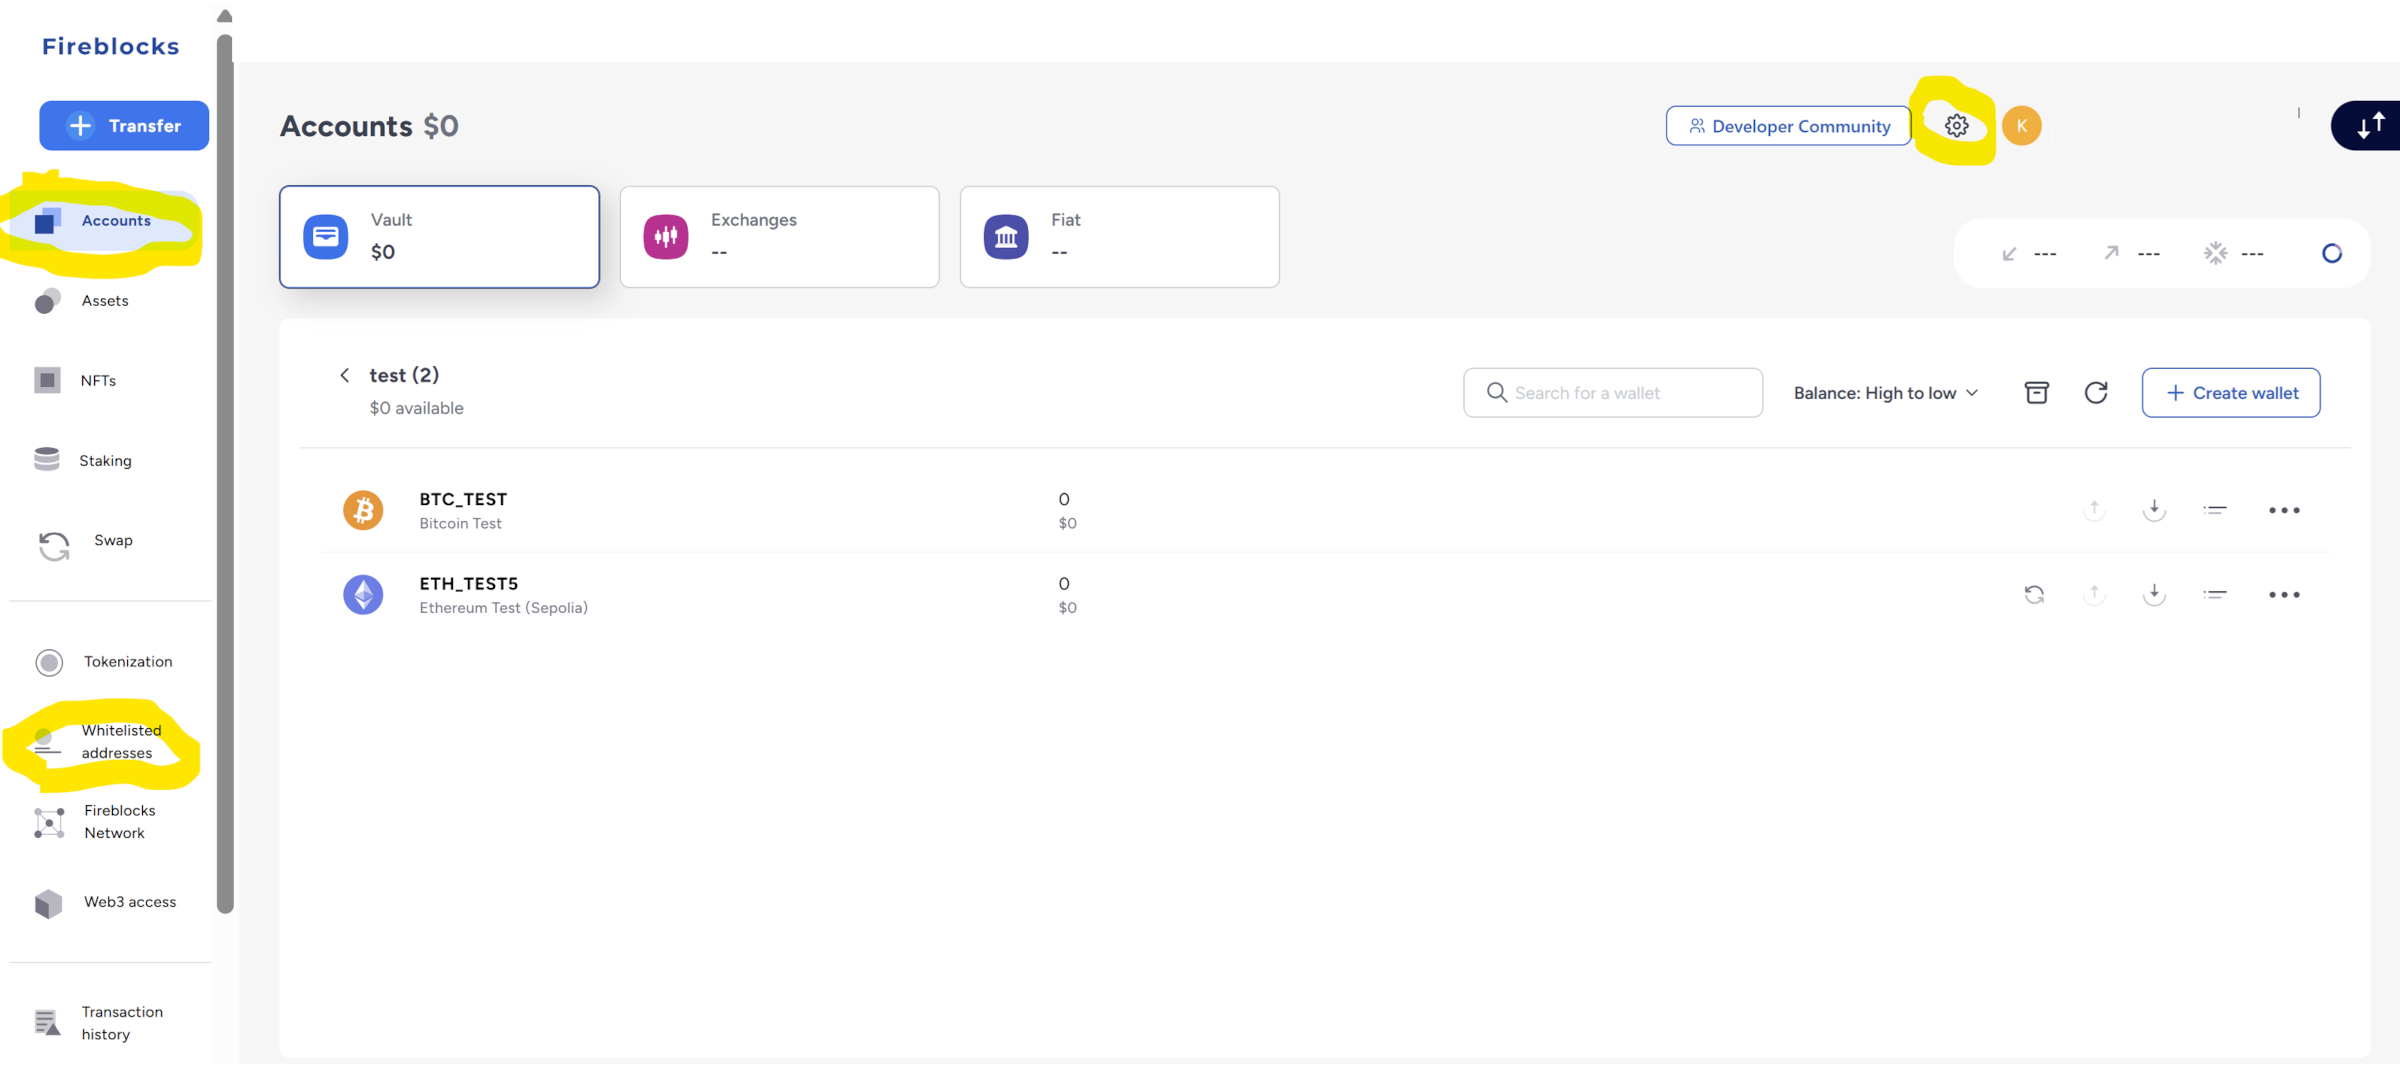
Configuration Workflow
Many of your interactions with Fireblocks are done through their web-based Fireblocks console. The key components we’ll talk about are highlighted in yellow in the screenshot below. These show vault accounts at the top left, whitelist addresses is below that, and you get to see TAP rules by clicking the wheel at the top right. All screenshots are taken from the Fireblocks Sandbox which you can sign up for to try out their product for free.
Your rough workflow for configuration is going to be:
- You create your
vault accounts, these are the accounts whose private keys are managed by Fireblocks and that hold asset balances you see on the vault accounts screen in the console. The above screenshot also shows avault account, with two addresses in it. One is for Bitcoin, one is for Ethereum. - You create your
whitelist addresseswhich, together with thevault accounts, define the “world” with which we can interact. - You define your
TAP ruleswhich say what sort of transaction are permitted, which are not permitted, and which need to go for further approval.
Next let’s look at their whitelist addresses config screen, which shows an address that’s been added for USDC on Base Sepolia.
Finally, here is their TAP rule config screen, kind of difficult to see because they grey it out as non-editable in the sandbox, but it is highlighted in red:
As a final note, it is possible to interact with non-whitelisted accounts in certain situations. There is a global setting called One-Time Account (OTA) that can be temporarily switched on. With OTA switched on, you are still protected by your TAP rules, but the TAP rules can be configured to allow interactions with any address. This can be useful during, for example, deployment processes, but as a general rule should be left switched off.
Transaction Workflow
Once configuration has been done, we’re ready to send a transaction on-chain, mediated by Fireblocks.
Initiating a Transaction
You can send a transaction on-chain in several ways, including:
- Calling the Fireblocks API.
- Using the Fireblocks browser wallet from a site like etherscan.io to interact with a contract.
- Use the Firelocks Console to make fund transfers.
Once you’ve sent a transaction, instead of it going to your RPC provider as usual, it goes to Fireblocks. There, Fireblocks processes the TAP rules to decide what to do with it. Does it get automatically accepted or rejected? Or does it need to go for further approval?
Approving Transactions
Approvals are handled via MPC with a device owned by each approving party. Fireblocks follow the security pattern of involving something you know (your Fireblocks approval pin), something you have (the device with the Fireblocks app on it) and something you are (the biometrics check done by the device, either fingerprint of face recognition).
The Fireblocks app is a polished phone application, and very simple to use:
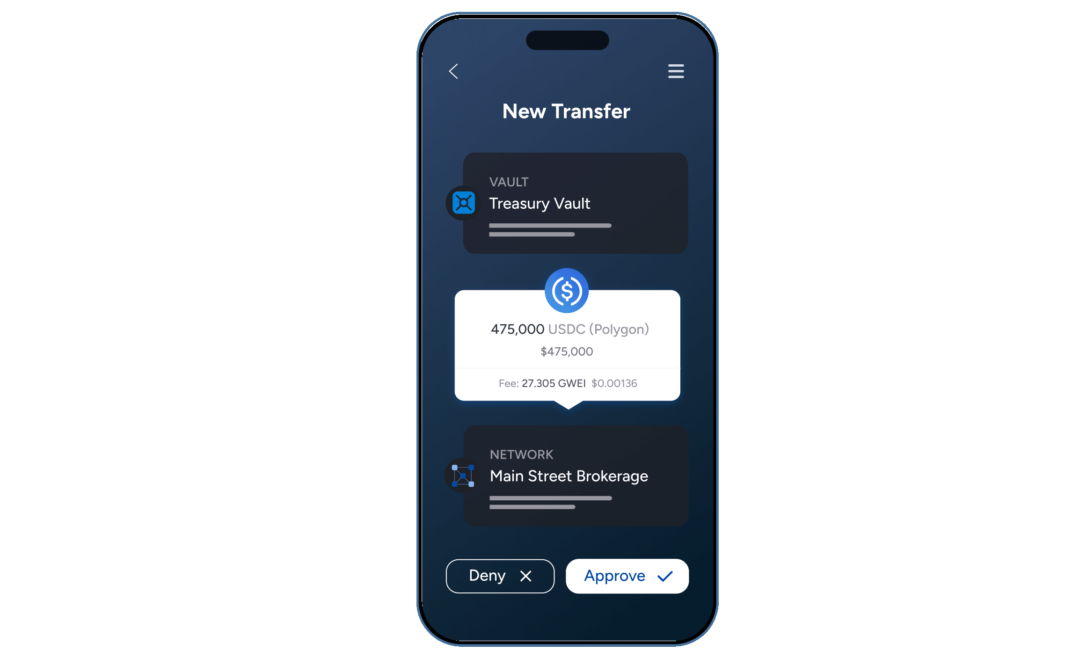
Note shown in the above screenshot are two really useful features available in more recent versions of the phone app:
- The phone app shows a simulation of what the transaction will do, what balances will change for what assets.
- The phone app shows a field containing a note, explaining what the transaction is doing and why. This note can be populated by the application that initiated the transaction via the Fireblocks API or SDK.
These two additions make signing and approving a transaction a more comfortable process, because you get to see supporting information about the transaction.
The phone app security features and the supporting information combine to make, to my mind, a much more secure process than using a browser-based wallet alone. It is well known that browsers can be hacked, and what you might see in a brower-based wallet popup asking you for a signature might not be what you are actually signing. A compromised browser-based wallet might show a benign transaction for signing, but what you are really signing might be very different. To compromise the Fireblocks phone app would not be impossible, of course, but it would be much, much more difficult to achieve.
Transaction goes on-chain
Fireblocks now sends the signed transaction on-chain where it looks the same as any other transaction. You can’t tell it was mediated by Fireblocks.
Other things to know
So we’ve got a transaction on-chain. Easy-ish peasy-ish. We’re left with a small assortment of “oh yes, you should also know…” topics that we’ll review in this section. In no particular order:
Can I trust Fireblocks?
Fireblocks has a solid security track record, at the time of writing it’s never been hacked. It holds multiple ISO certifications which means it’s been independently audited for security best practices. It’s non-custodial, so ultimately if Fireblocks were to shut down tomorrow, you wouldn’t lose access since key backups and third-party recovery options exist.
Under the hood, Fireblocks uses Intel SGX (Software Guard Extensions) to secure key share in isolated, hardware-protected enclaves. This means even if a server gets compromised, attackers can’t extract the key material.
Support in my experience has been very good, responsive and knowledgeable.
Could I use Safe Wallet (Gnosis Safe) instead?
It depends on what you need. Safe Wallet (formerly Gnosis Safe) and Fireblocks both help secure your assets, but they work in very different ways.
Safe Wallet is a smart contract wallet that uses on-chain multisig. You set up multiple signers, and transactions only go through when the required number of approvals are met. There is no private key to lose, because smart contracts don’t have a private key, but everything happens on-chain, which means higher transparency but also more gas fees. You also don’t get the built-in biometrics like Fireblocks have, each signer can choose whatever wallet they want.
Fireblocks, as we’ve seen, uses MPC and SGX to split private keys into fragments across different servers, so no one (not even Fireblocks) ever has full access to your key. Approvals happen off-chain based on the TAP, which is private and doesn’t cost gas.
If you’re running a DAO or a DeFi project, Safe Wallet might be a good fit because it’s fully decentralized. If you’re managing institutional assets, trading frequently, or need automated policy-based approvals, Fireblocks may be a better option.
Disclaimers
I don’t work for Fireblocks and have no vested interest in people using them.
Next Steps
There is some material on the Fireblocks website, but note that a lot of their help material is only available once you’ve logged in. They have a limited Fireblocks Sandbox as mentioned earlier. Their Postman API and SDK are public.